Palo Alto Networks - LDAP and Group Mapping config guide
In order to configure your Palo Alto Networks firewall to do filtering based on Active Directory (LDAP) user groups, you have to configured the firewall to poll your domain controllers for group membership information. The User-ID agents only identify the user names of your users, but in order to sort them into groups, you have to configure Group Mapping.
What you’ll need:
The name and IP address of your domain controllers (and the domain)
A Bind DN and password of an AD administrator (CN, OU, DC, etc)
The Active Directory groups you want to add to Group Mapping
Create LDAP Profile
The first step is to go to the LDAP Server Profiles section under the Device tab. We’ll be Adding a new LDAP Server Profile.
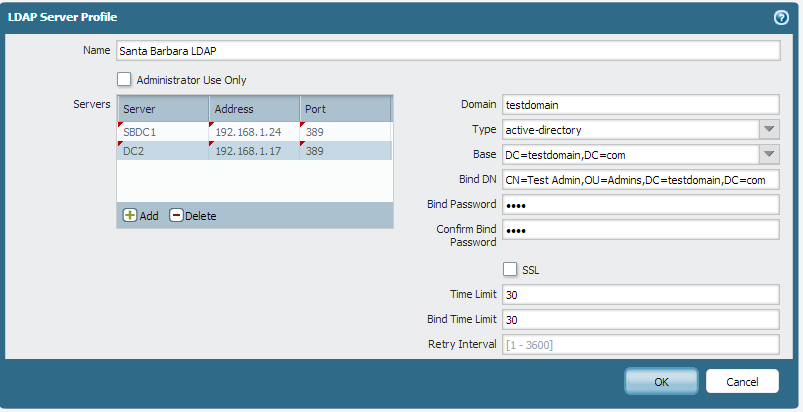
For the server column, just fill in the name of the server. Obviously you put the IP address into the address column. Finally, pick your LDAP port, which is 389 by default.
For domain, you want the NETBIOS name of your domain, NOT the FQDN. If you put the FQDN in here, you’ll get a mismatch from your User-ID agent and nothing will work. Select ‘active-directory’ for the LDAP type, and then fill in the base with your base domain LDAP string.
The Bind DN is the user account that the firewall will try authenticating with. If you set your view to Advanced in ADUC, you can go to the Attribute Editor tab of the user object and just copy the DN right from Active Directory. Enter in the user’s password. I suggest using a service account for this.
Create a Group Mapping
You’ll now be navigating to the Group Mapping Settings tab, which is the User Identification section, under the Device tab. We’ll be making a new mapping.
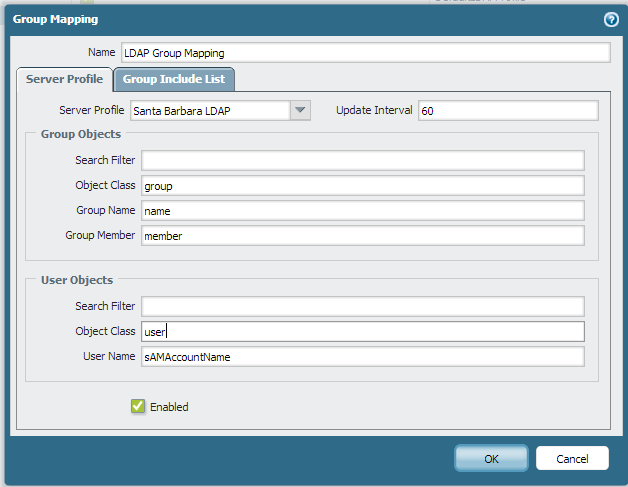
First, select the server profile that you just created. The update interval is the time between group refreshes, in seconds, so set it to something like 60 seconds. Finally, change the default object class to ‘user’ instead of ‘person’. Leave everything else at the default, then hit the group include list tab at the top.
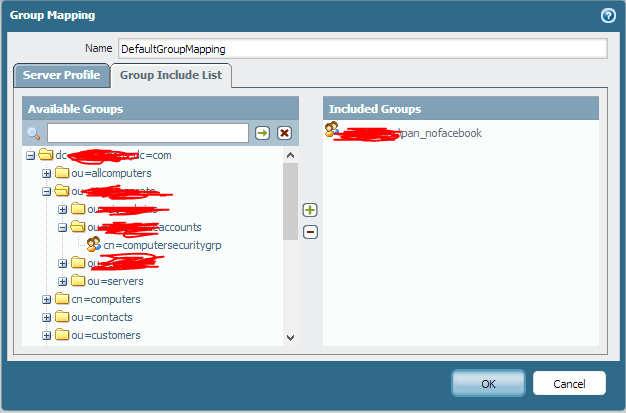
Navigate the directory on the left and select the groups you’d like to map. You need to map any groups that you’ll be using in policies. In my case, I picked the “pan_nofacebook” group in order to block Facebook for certain users. If you’re not able to navigate the LDAP tree on the left, check your server profile for any errors.
Create a Group-based Policy
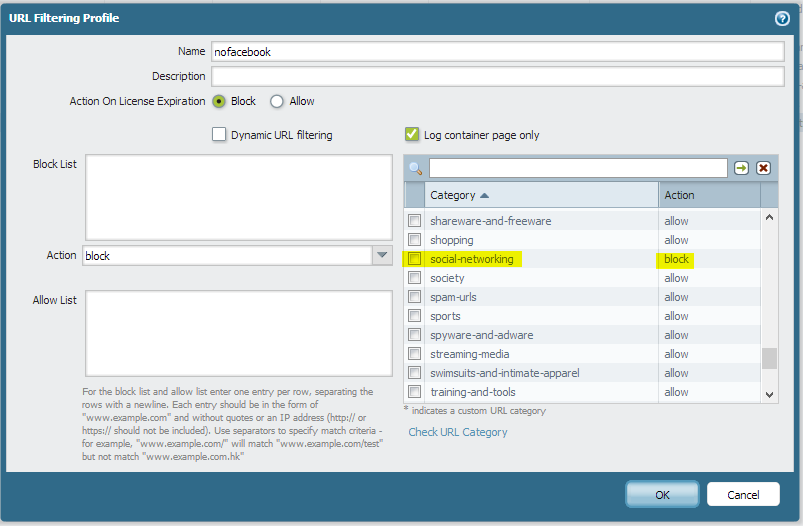
****Now that we’ve created our group mappings, we can use these Active Directory groups in our security policies. I whipped up a quick URL Filtering Profile to block social networking sites.
Head over to the Security section under the Policies tab, and we’ll put all the pieces together.
Create your policy from your Trust to Untrust zones, and select the Active Directory group in the source user section.
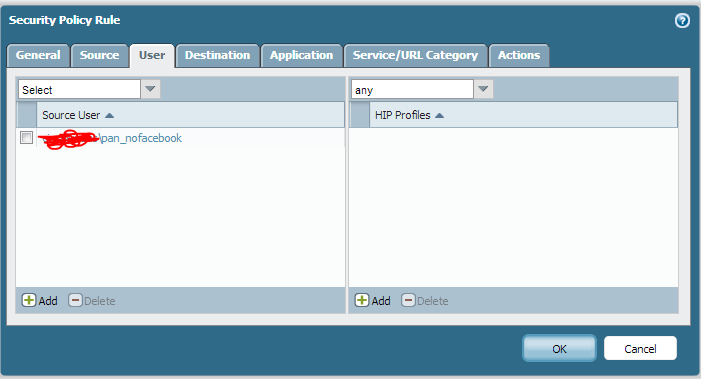
The groups you’ve selected for mapping with automatically show up when you go to add a source user. Now, go to the Actions tab.
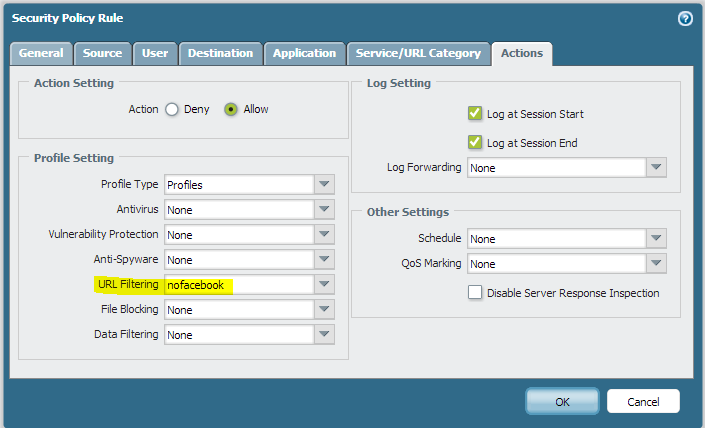
I’ve selected my URL Filtering profile of ‘nofacebook’ which will block social networking for the users, while allowing all other traffic through. This policy will only apply to users that are in the ‘pan_nofacebook’ group that have their User-ID mapped by the User-ID agents. The final product results in targeted URL filtering application.
